Your website holds a ton of valuable data about your users, customers, and potential leads. But in order to do any meaningful analysis with all your tracking data, you first have to collect it successfully.
In this post, we’re going to go over step-by-step instructions for how to set up Custom Alerts in Google Analytics (GA). Custom Alerts help marketing and analytics teams identify problems quickly, so they can address problems in the early stages. The basic Custom Alert we provide here will notify you the next day if your tracking is compromised (or your site is down).
Important Note: Custom Alerts must be created by each GA user who wants access to the diagnostic report provided after an Alert is fired.
Instructions for Setup
ALARM – NO TRAFFIC – Daily Sessions is less than 5
This type of Alert is very common, as it applies to just about every site. The Alert will fire when fewer than 5 sessions are recorded to your site in a given day. We chose the number 5 because on a busy site a few sessions might still be recorded even if tracking isn’t working properly. If your site has a high variance of user sessions, you might raise or lower that number accordingly. For our purposes here, when daily site sessions drop below 5, we’re assuming either the tracking implemented has broken, or the site is down.
Here are step-by-step instructions for how to set up this Alert:
Create a custom segment to be used in the Alert.
- Navigate to the Audience tab on the left-hand side and click overview.
- At the top, click “+ Add Segment.”
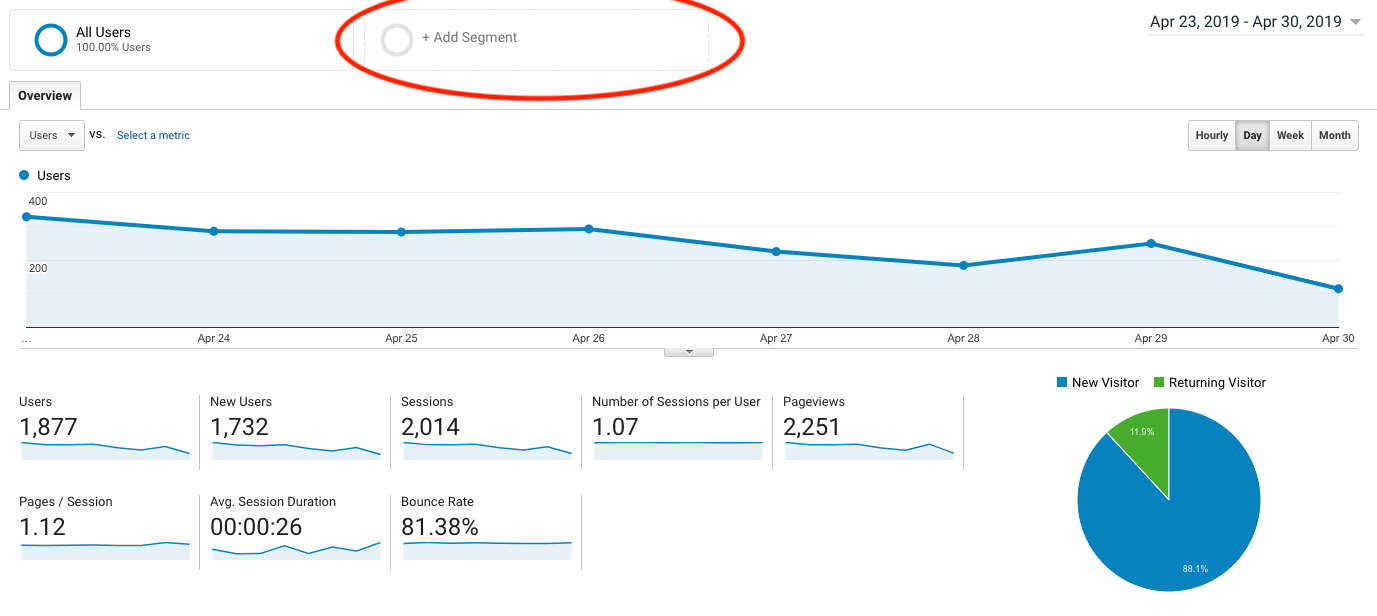
- Then click “+ New Segment.”

- Name the segment. We recommend using a standardized naming convention, such as [Website name] – [Sessions/Users scope] – [Rules]. For example, Anvil Analytics – Sessions – viewed contact page.
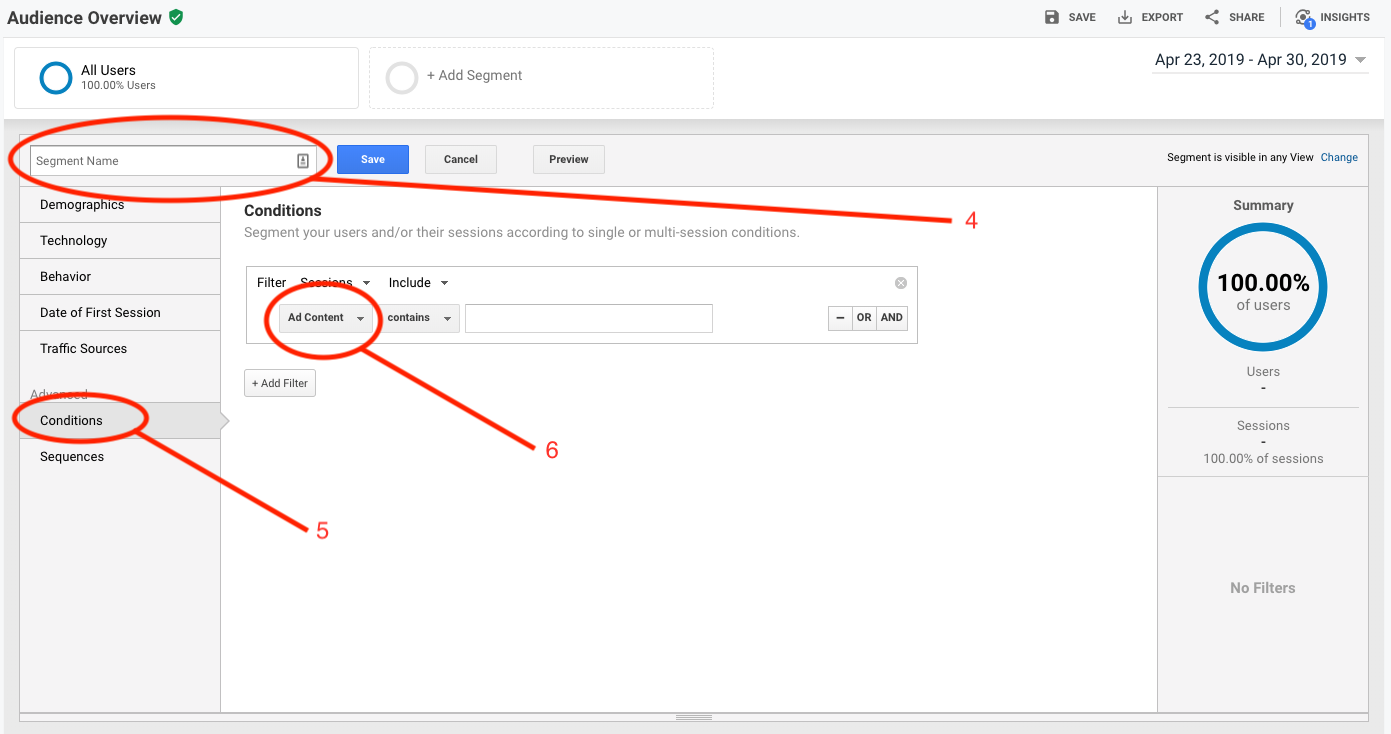
- Click on “Conditions”.
- Change default value to “Hostname.” Set the Hostname to your URL, for example, hedyhoppdev.wpengine.com.
- Click “Save.”
Create the Custom Alert.
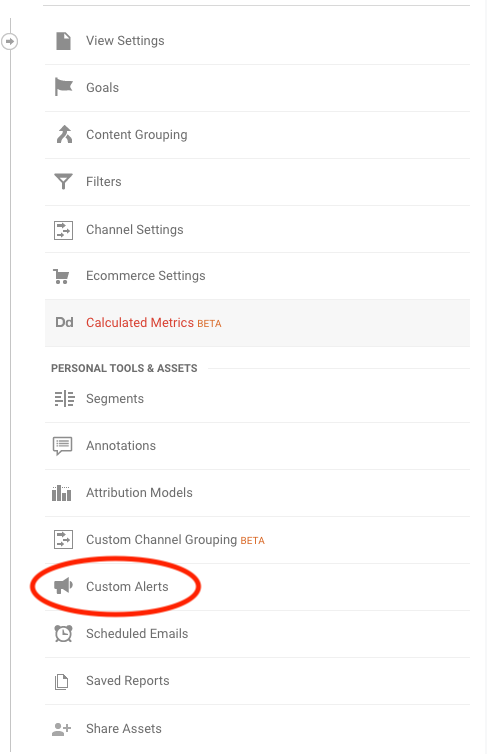
- Go to GA Admin.
- Click the Gear on the bottom left-hand side. In the view column, click on “Custom Alerts.”
- Click the button that says “+ New Alert.”
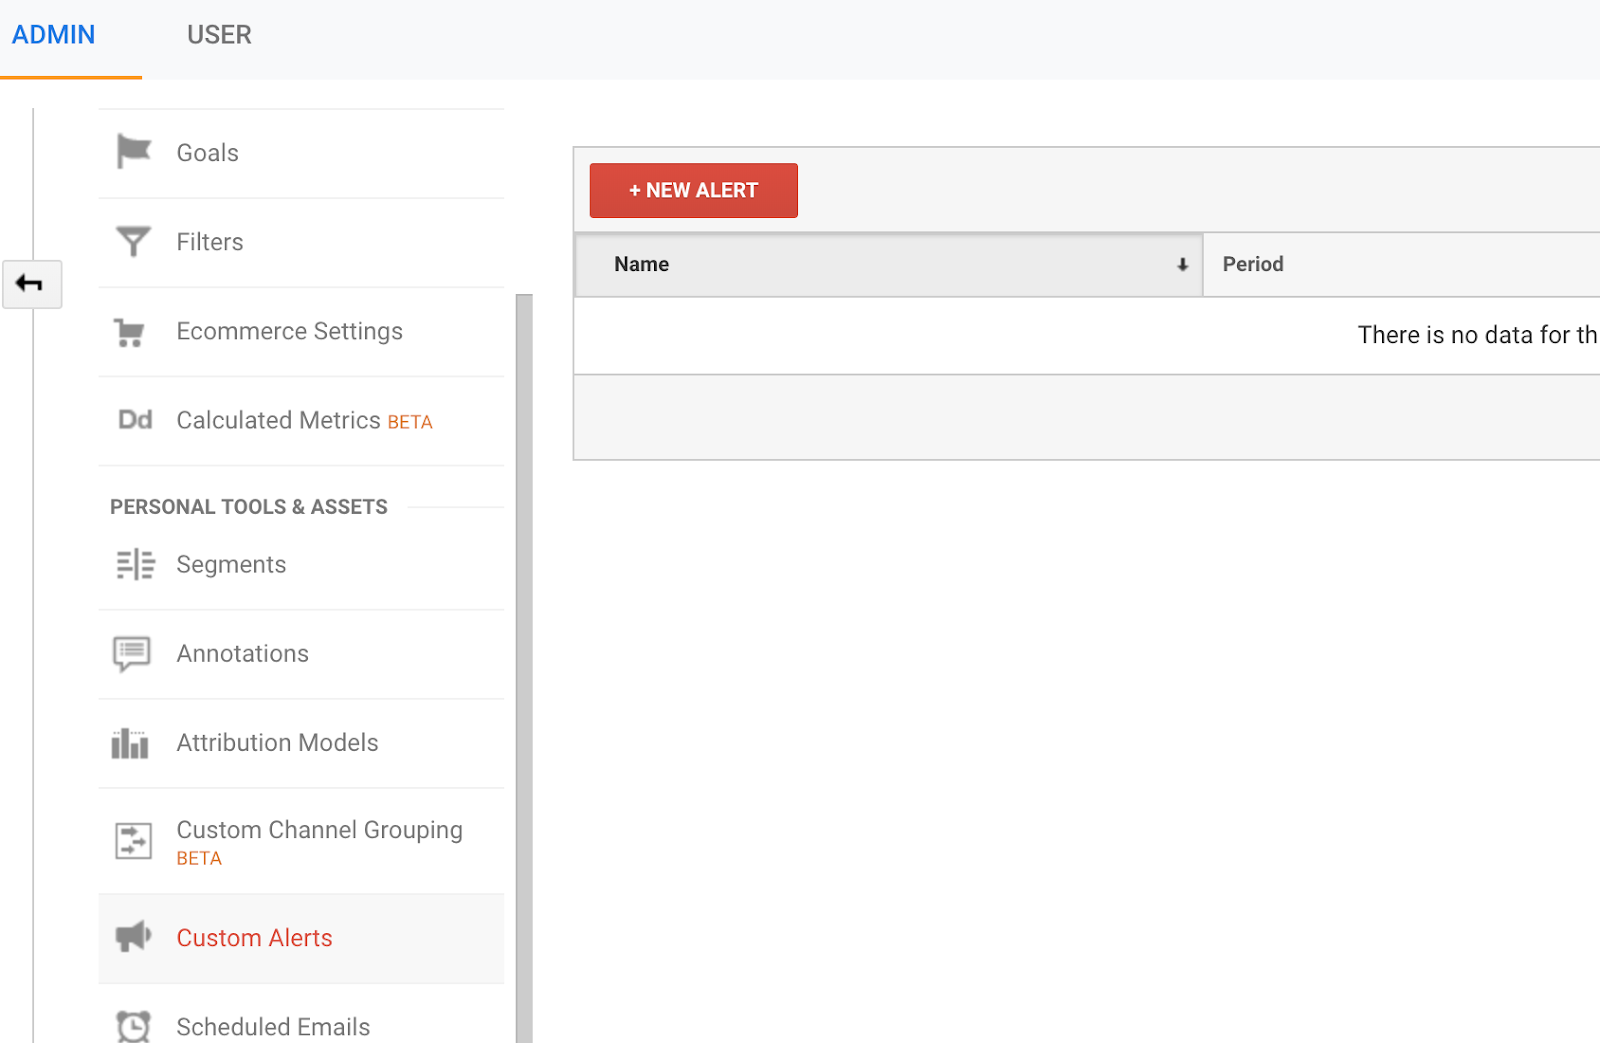
- Then you should see the following screen:
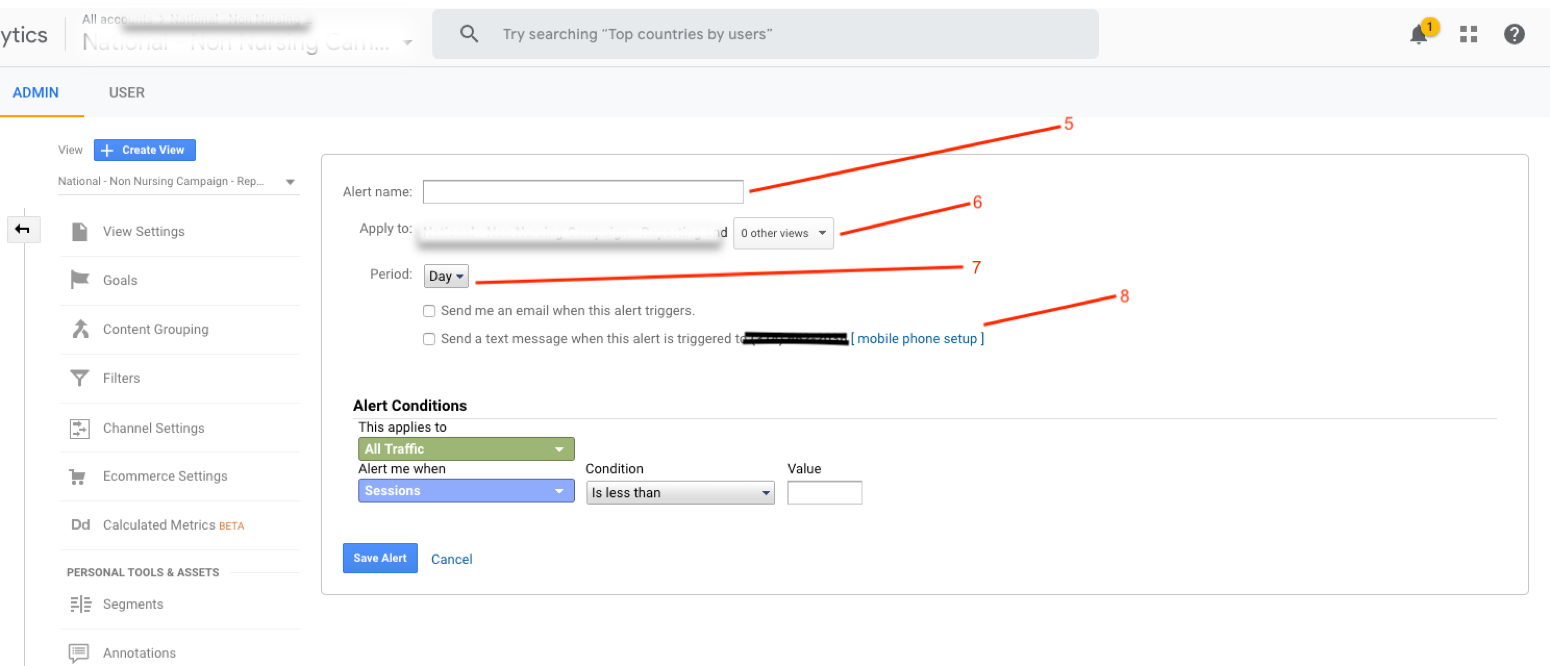
- Name the Alert “ALARM – NO TRAFFIC for – Daily Sessions is less than 5.”
- Don’t apply to other views.
- Leave the period set to “Day.”
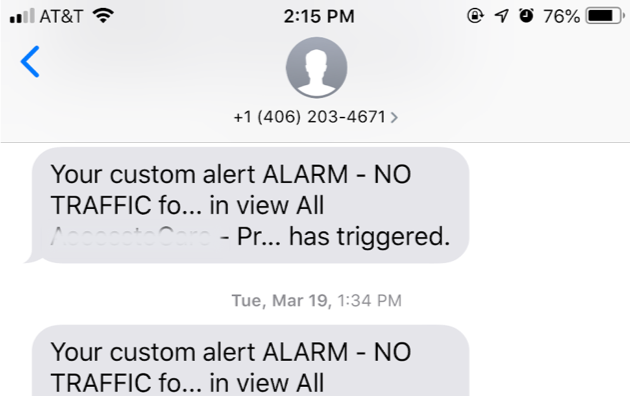
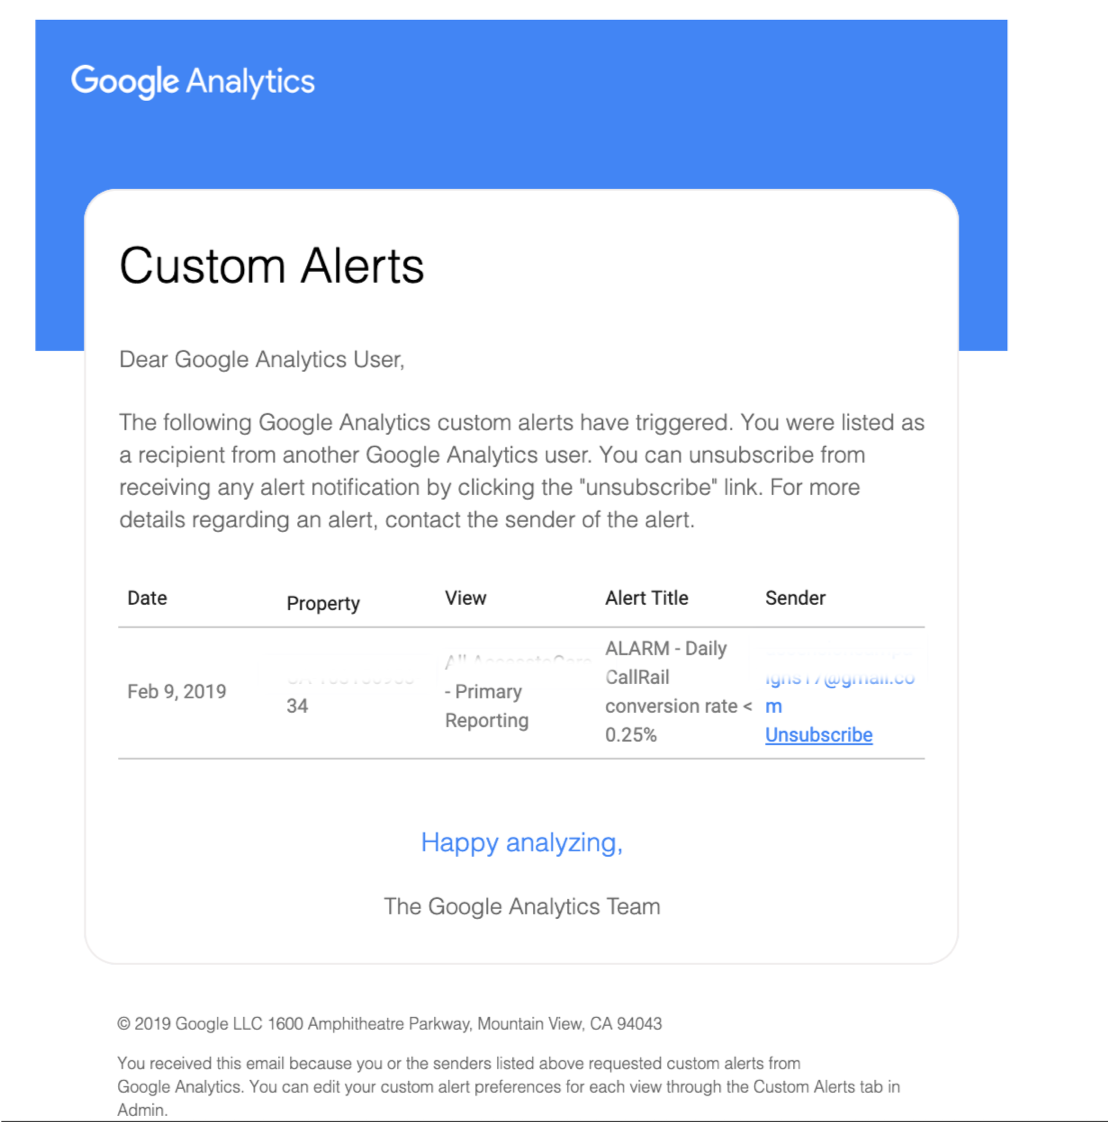
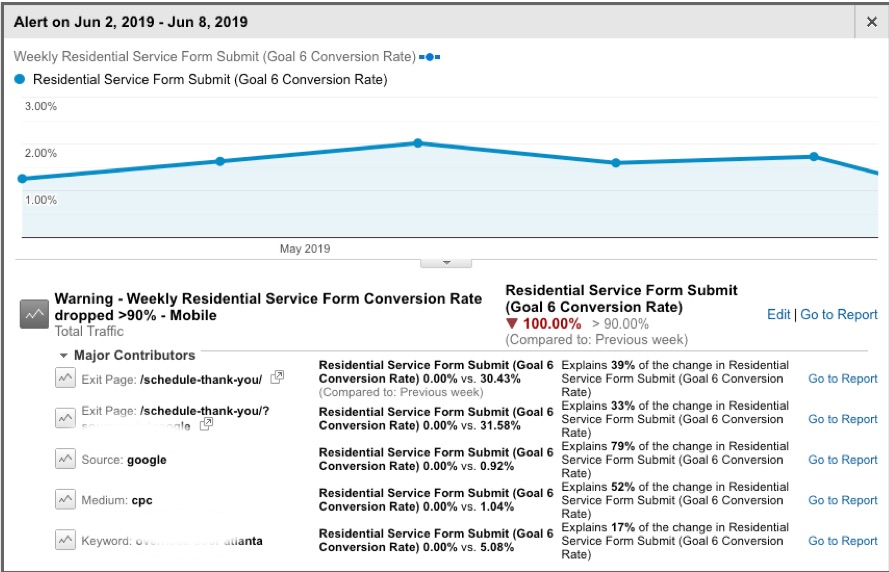
- Decide if you want to be alerted either by email, or by both email and text. The text alert will include more limited information. As a reminder about the email alert, you can decide if you want other members of your organization to receive the email. However, even though they will be alerted, the diagnostic report will only be available to the GA user who created the Custom Alert.
An example of a text alert:
The email alert:
And the diagnostic report:
- Under alert conditions, in the “this applies to” dropdown menu, change “All Traffic” to the name of the segment you created above (Anvil Analytics – Sessions – viewed contact page).
- Leave “Sessions” selected in the “Alert me when” dropdown menu.
- Leave “Is less than” selected in the “Condition” dropdown. Set the value to 5.

- Click the blue button that says “Save Alert.”
You’ve Set Up Your First Custom Alert…Now What?
Setting up a standard Custom Alert like this one is a simple way to ensure the consistency and accuracy of your tracking so that you can monitor your site’s traffic.
In addition to simple, standard Alerts like this one, you can use GA’s Custom Alerts to set up more complex warning systems to monitor your website’s marketing strategy. For example, you might want to know if the conversion rate for a certain key touchpoint falls below a particular threshold during a given week. We’ll cover the process for that in a later post.
If you’re interested in learning more about how you can leverage Google Analytics to boost your marketing analytics capabilities and improve your digital return, get in touch!

